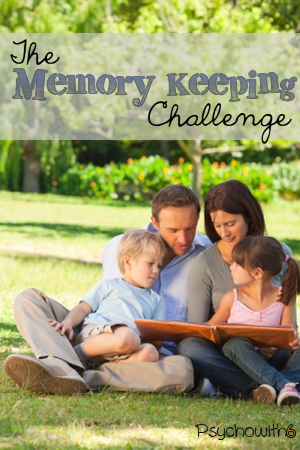
 Everyone has the challenge of keeping photos, video, and other memorabilia organized, but for homeschoolers, it’s an even more important undertaking.
These memories may be used as part of our homeschool record keeping. We may not have yearly photos or a yearbook to rely on. We may have many children or many activities to document. When you add in memories that predate our homeschooling to the to-do list, it can be easy to feel overwhelmed.

But the goal of having memories in a form that can be enjoyed now and in the future is a worthy one. So where do we begin?

![]()
#1 Discuss and Choose a Method for Organizing Memories
Today we have many options for keeping photos, videos, and even memorabilia organized and accessible. That’s the good news. The bad news it can be harder than ever to decide the best way to keep your memories. Talk with your family about the method they prefer.
Keeping Memories in Acid-Free Organizers
Many experts recommend having prints made of your best photographs, rather than relying on digital media that may fail. Even if you prefer not to get prints, you likely have a number of older photos that haven’t been safely organized. If that’s the case, I recommend a Cropper Hopper Photo Case which can hold up to 2000 photos. I have a number of these cases and use them to organize my photos by topic. This method has allowed me to find old photos quickly.
Photos, videos, and memorabilia can be kept in acid-free and inexpensive boxes. 
![]() Larger art pieces and newspapers can be kept in over-sized storage boxes.
Larger art pieces and newspapers can be kept in over-sized storage boxes.
I keep school papers and certificates in a hanging file folder for each child by school year. This will enable me to display the memories at a later time.
![]()
Displaying Memories
Displaying memories can be creating a detailed scrapbook, slipping photos into an album, or doing Project Life (my current fave) which is somewhere in-between.
Displaying memories can also be framing artwork, changing photos on a display, or having memorabilia professionally framed. Check out this Pinterest board with creative ideas for displaying photos.


Digital Storage
You may decide that keeping your photos in a digital format is the best choice for you. I recommend Eye-Fi cards for automatic photo uploading. I also love that my iPhone automatically backs up my photos to Google+.

![]()
Would you like to have all your photos and videos in digital format? You can convert them at home with a scanner or a video capture device. Or you can pay for conversion through a service like FotoBridge. You can also shoot photos and video of bulky memorabilia that you don’t want to hold onto.
We display our digital photos on our kitchen iMac’s screensaver, but digital photo frames are another option.
Videos can be displayed by editing them into short enjoyable movies of the best clips or photos by you or a professional.
#2 Purchase Materials & Move Memories to a Safe Place
You’ll want to purchase any materials or services necessary to help you preserve your memories (see the links above), but don’t wait to move your memories to a safe place.
At one time, I had photos in the basement. The basement is the most likely place to experience water damage, so I moved them to the main floor. Memorabilia should also be kept away from sunlight. Choose acid-free containers rather than shoe boxes. As soon as possible, plan to safely remove photos from magnetic albums that aren’t acid-free.
Digital memories must also be kept safe. I keep my photos and videos on multiple external hard drives as well as on a computer and in online storage. If you don’t have a system for backing up these memories, set one up today.

 #3 Begin Documenting 2013 With Help
If you don’t know where to start, begin by documenting the past year. Collect photos and videos into folders by months. One of my favorite quick ways to document a year is by creating a calendar. Shutterfly offers a number of options for doing this. If you choose a 12×12 calendar, you can store the pages in a scrapbook when the year is over. This is a perfect project for kids, too. Even if all you do is organize the past year’s digital photos and videos by putting them into folders, you’ll be a lot more organized.
Start organizing memorabilia from this school year, too. Be sure to follow the Organized Homeschool board on Pinterest for other ideas.
#4 Choose a Top Priority Project and How to Complete It
Besides organizing memories from the previous year, choose another project that you’re motivated to complete. I have a son who is graduating from high school this May, so completing his school years scrapbook is a top priority. You may have an event that you’d like to make special by having memories on display.
Decide together what to tackle first and then determine how everyone can help. Young children can slide photos into a book. Older kids can learn to edit videos.
Want more help organizing your photos? Organized Photos is my favorite website.
I would love to hear what your top priority is for memory keeping.