I’m all about sanity, especially when it comes to the Christmas season. I don’t make fancy food and guess what? People love my simple recipes.
My recipe for Oreo Truffles is no exception. I don’t make them as gifts because in a family of eight, they disappear almost as quickly as I make them. Whether you serve them to your family or wrap them up as gifts, they’re sure to be a hit.
Oreo Truffles Recipe
Ingredients
1 package of Oreos (or a generic brand of similar cookies to save money)
1 package of cream cheese, softened
2/3 package of chocolate almond bark
Directions
Process the entire package of Oreos in a food processor with the regular blade attachment until it’s crumbly. Add the cream cheese and process again until the mixture forms a ball. Put the mixture into the refrigerator to chill for at least 30 minutes. Melt almond bark in the microwave in a microwave-safe bowl, stirring a few times before it’s completely melted. Form the chilled dough into quarter-sized balls. Drop into melted chocolate, rolling with a spoon until covered. Lift the truffle out with a spoon, tapping the spoon to remove excess chocolate. Roll truffle onto a wax-paper covered cookie sheet. Store completed truffles in the refrigerator. Use a knife to trim truffles to make them prettier…if they last long enough.
You can package them as a gift in boxes like these.
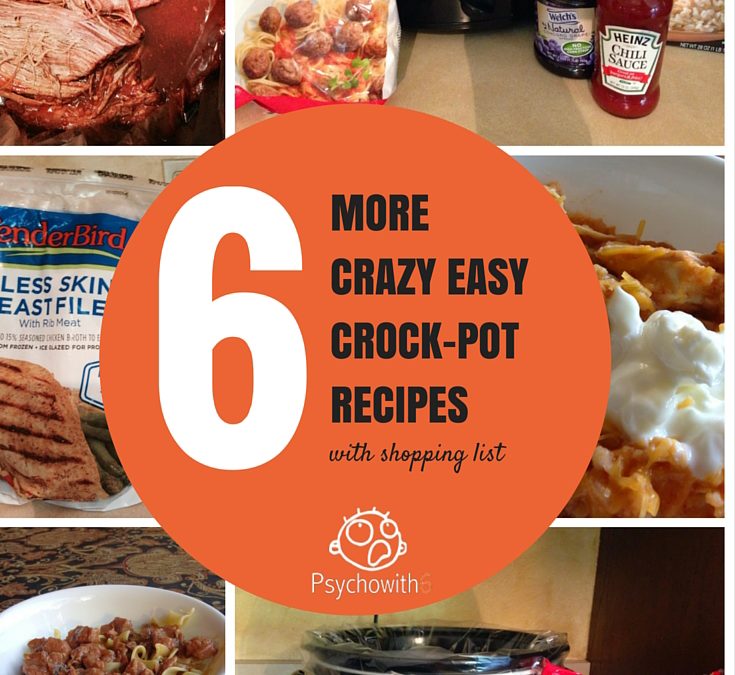
I was amazed by the response to my 6 Crazy Easy Crock-pot Recipes post. I really thought people would be put off by how simple the recipes were, but they loved them! (Scroll down to get five of the original six recipes.)
So I decided to share six more crazy easy recipes. My family loves these! And I love that dinner is ready early in the day in just a few minutes’ time.
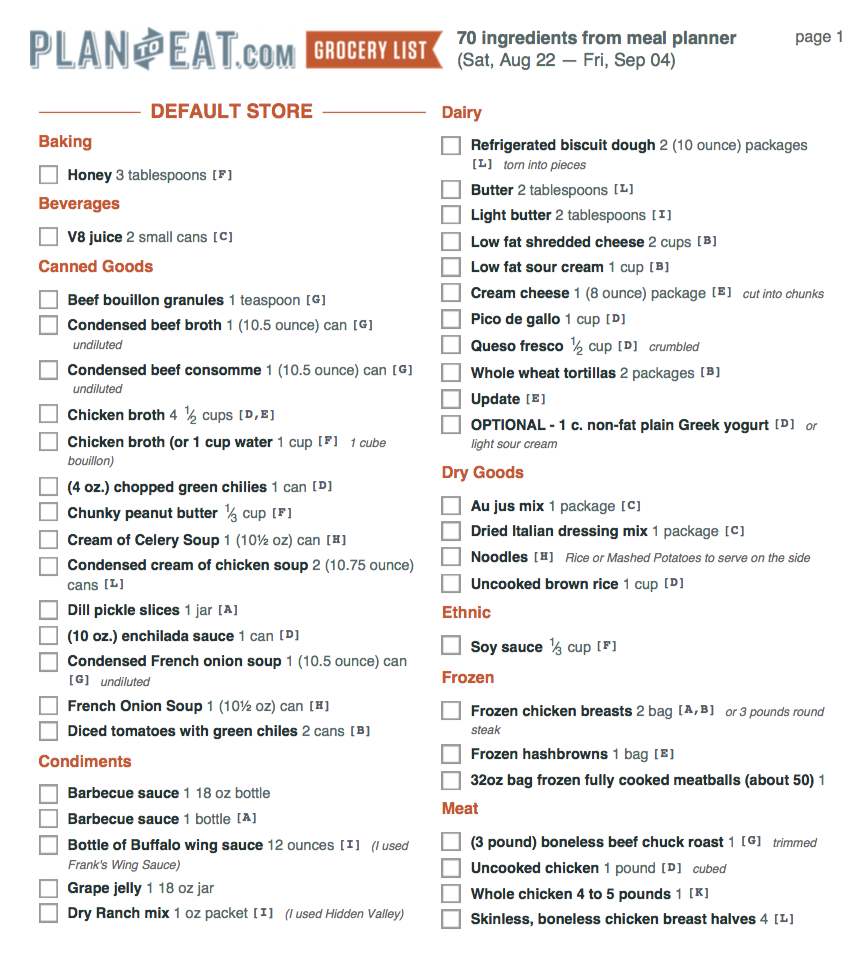
If you want even more dinner time sanity, click to download my Plan to Eat shopping listfor these recipes AND the original recipes. You could even double the whole list and have meals planned for the month. I am substituting an easy recipe for the award-winning chili recipe on the original post. So you’re actually getting seven new and easy slow cooker recipes. Are you ready to get cookin’?
SUBSCRIBERS>> You already have the shopping list in your Subscriber Freebie folder linked at the bottom of this email.
This is so very satisfying if you’re a Mexican food fan. Avocado isn’t essential and you can easily sub Mexican shredded cheese for queso fresco and salsa for pico de gallo.
Serves:4
Ingredients
1 lb.uncooked chicken cubed
1 c.uncooked brown rice
1 can(10 oz.) enchilada sauce
1 can(4 oz.) chopped green chilies
1⁄2 c.chicken broth
1 mediumonion chopped
1 tsp.cumin
1⁄4 tsp.salt
1 avocado
1 c.pico de gallo
1⁄2 c.queso fresco crumbled
OPTIONAL – 1 c. non-fat plain Greek yogurt or light sour cream
Directions
Spray your Crock Pot with non-stick spray (use a liner instead!) and add the chicken, rice, enchilada sauce, green chilies, chicken broth, onion, cumin and salt.
Stir to combine and cook on low for 5-6 hours or high for 3-4 hours.
Serve topped with pico de gallo, queso fresco and Greek yogurt.
We love all things buffalo and this couldn’t be an easier way to enjoy the spice!
Serves:12
Ingredients
3 lbsraw boneless skinless chicken breasts (the original recipe used frozen breasts but I used them unfrozen, so it appears you can do either)
12 ozbottle of Buffalo wing sauce (I used Frank’s Wing Sauce)
1 oz packetdry Ranch mix (I used Hidden Valley)
2 tablespoonslight butter
Directions
Place the chicken breasts in your slow cooker. Pour the bottle of wing sauce over the top of the chicken. Sprinkle the packet of ranch mix over the top of the wing sauce. Place the lid on your slow cooker. Cook on low for 7-9 hours until meat shreds easily.
Remove meat and shred it using two forks. Return shredded meat to the sauce and add the butter. Stir to combine. Continue to cook on low for another hour so the meat can soak up the sauce. Serve however you like!
The epitome of easy! Just pour barbecue sauce on the frozen chicken and cook on low for 6-8 hours. Use a mixer to shred chicken. Pickle slices optional.
You can add frozen veggies to this and serve it over biscuits you make in the oven too.
Prep Time: 10 min
Cook Time: 6 hr
Total Time:6 hr 10 min
Serves:8
Ingredients
4 skinless, boneless chicken breast halves
2 tablespoonsbutter
2 (10.75 ounce) canscondensed cream of chicken soup
1 onion finely diced
2 (10 ounce) packagesrefrigerated biscuit dough torn into pieces
Directions
Place the chicken, butter, soup, and onion in a slow cooker, and fill with enough water to cover.
Cover, and cook for 5 to 6 hours on High. About 30 minutes before serving, place the torn biscuit dough in the slow cooker. Cook until the dough is no longer raw in the center.
So easy, cooking-phobic people will be happy to make it.
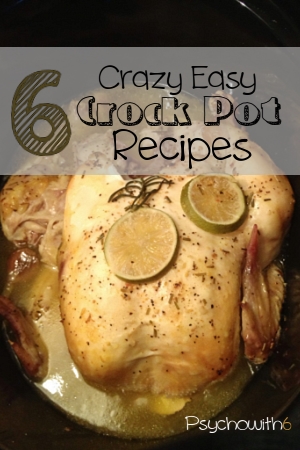
Prep Time: 10 min
Cook Time: 4 hr
Total Time:4 hr 10 min
Serves:4
Ingredients
4 lemons
3 headsgarlic
1 whole chicken 4 to 5 pounds
Fresh rosemary or any fresh herbs
All-purpose steak seasoning or salt and pepper
Directions
Cut garlic heads and lemons in half and lay in bottom of slow cooker.
Cut the bottoms off the lemons so they lay flat.
Add a sprig of rosemary, or any herbs.
Remove insides from chicken, rinse chicken and pat dry.
Season chicken well, inside and out, with all-purpose steak seasoning or salt and pepper.
Lay chicken on top of garlic and lemon slices and stuff the chicken with a garlic head cut in half, and a lemon cut in quarters.
Cover top of chicken with additional lemon slices and rosemary.
Turn slow cooker to high, and cook for about 4 hours, or until chicken reaches 165 degrees. Slow cooker cooking times vary. Important: Use a meat thermometer to check for doneness.
When chicken has reached 165, turn off slow cooker and let chicken rest for about 15 minutes.
Remove from slow cooker, carve and serve.
Liquid from slow cooker can be strained and served over chicken.
Halve roast and place in a 3-qt. slow cooker. Combine the soup, consomme, broth and bouillon; pour over roast. Cover and cook on low for 6-8 hours or until meat is tender.
Remove meat and shred with two forks. Serve on rolls. Skim fat from cooking juices and serve as a dipping sauce.
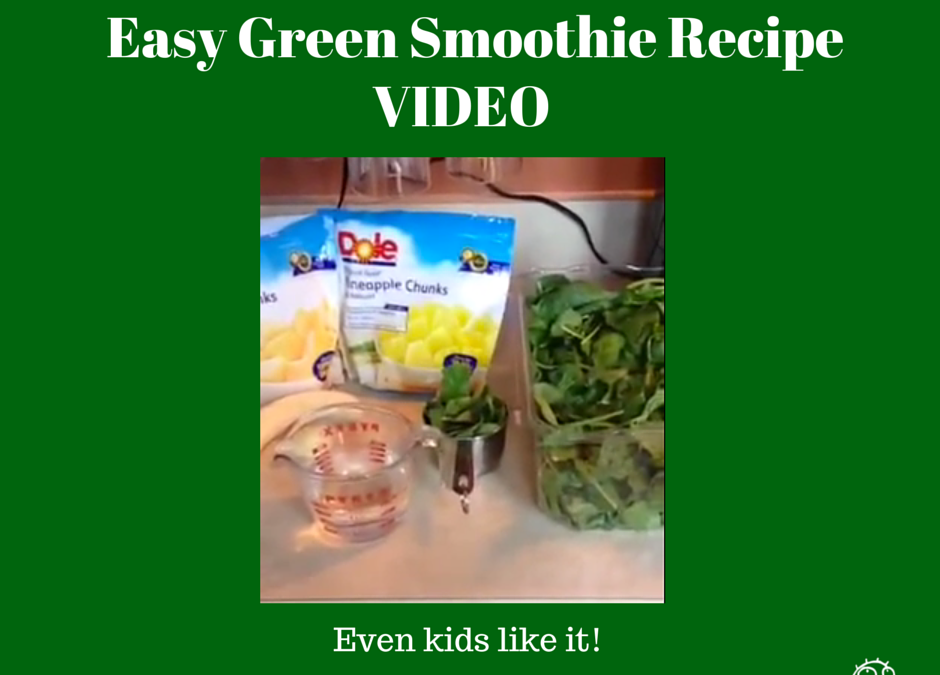
I love the green smoothies I can buy at the grocery store, but the problem is, they’re quite pricey! I wanted to make my own to save money and skip the preservatives. The nutrient quality should be even higher with homemade.
If you’re afraid of drinking greens, I encourage you to give this a try. It doesn’t taste like spinach. It tastes fresh and fruity.
Blend 2 cups packed baby spinach with 1 cup water until smooth. Add 1 banana, 1 cup frozen mango, and 1 cup frozen pineapple. I added a little more than 1 cup mango and the consistency was thicker. I liked it better!
Be sure to watch me on Periscope @Psychowith6 on Friday morning when I share a protein shake recipe that rivals any $4 number you can buy. Broadcasts are also announced on Twitter.
When you’re the teacher, the last thing you want is a long lunch duty shift. These crazy easy homeschool lunch ideas can buy you some relaxation time–especially if you have the kids make lunch!
I need easy and filling ideas because I have three teen boys still at home and a work-from-husband to feed. This is what we have for lunch on a regular basis. We typically add cold veggies (baby carrots, peppers, sugar snap peas, cucumbers) or salad to these entries. Each meal serves 6-8, so modify serving sizes as needed:
#1 French Bread Pizza
We love pizza as you will see from our lunch ideas, but we like a little variety like we get from this meal.
Ingredients
2 loaves of wide French bread, cut in half lengthwise
1 jar of pizza sauce
3 cups shredded mozzarella cheese
1 package pepperoni, 1 package of sausage crumbles, or both
Directions
Preheat oven to 400 degrees F. Put French bread cut side up on cookie sheet. Spread each loaf with pizza sauce. Sprinkle each loaf generously with mozzarella cheese. Cover each loaf with desired amount of pepperoni and sausage. Bake for 10-12 minutes or until cheese is melted and beginning to brown around the edges. Slice and serve.
#2 Buffalo Chicken French Bread Pizza
This is just as good with canned chicken!
#3 Pizza Roll-ups
We serve these with marinara and they are absolutely fabulous!
#4 Pizza Burgers
This is my Aunt Sharon’s recipe. You can make up a bunch of these to freeze. Wrap them in aluminum foil and bake them frozen at 350 for 45 – 50 min. Save time by browning ground beef ahead of time and freezing in bags. Pop the frozen beef into the microwave and in just a few minutes, your lunch will be ready.
Ingredients
2 pounds lean ground beef
12 hamburger buns
2 cans tomato soup
2 tablespoons Italian seasoning
1/4 cup Parmesan cheese
1.5 cups low fat shredded mozzarella cheese
Directions
Brown ground beef. Drain ground beef. Add soup, season, cheese and heat through. Serve on buns immediately or bake for 15 minutes at 350 for crusty sandwiches.
#5 Homemade Hot Sub Sandwiches
Again, we often eat regular cold sandwiches on sliced bread, but there’s something about hot sandwiches on French bread that makes lunch more exciting. The bonus is that they’re cheaper than restaurant fare!
Ingredients
3 sandwich-size loaves of French bread, sliced midway lengthwise
Your favorite deli meats (we use smoked turkey, hard salami, and sandwich-style pepperoni)
Your favorite deli sliced cheese (we use cheddar cheese slices from Sams Club)
Your favorite condiments (we love Miracle Whip and at least one of us adds mustard)
Directions
Assemble sandwiches. We like to add our condiments before baking, but you may like to add them later. Bake at 350 F for 5-6 minutes or until cheese is melted and the bread is beginning to get crusty.
#6 Chicken Quesadillas
These are so easy and yet they are so good, especially when served with sour cream and salsa.
Ingredients
2 cans white chicken meat, drained
6 large flour tortillas
2 T chili powder
2 cups shredded Mexican-style cheese (I use the 2% fat kind)
Salsa & sour cream as condiments
Directions
Preheat oven to 450 F. Mix chicken and chili powder in a microwave-safe bowl. Cook for two minutes on high * Meanwhile, spray a large flat cookie sheet (no raised edges) with olive oil cooking spray. Arrange 3 tortillas on sheet. Spread warmed chicken mixture evenly on tortillas. Cover with shredded cheese. Top with remaining tortillas. Bake for 5-6 minutes or until tortilla begins to brown and curl. Cut each tortilla into four pieces with a pizza cutter. Serve with desired condiments.
#7 Burritos
We serve these with con queso and sour cream and they’re as good as restaurant fare and so easy!
#8 Nachos
So it isn’t the healthiest lunch, but it’s probably the quickest. When I’m in a hurry, there’s nothing like nachos to get lunch to the table fast.
Ingredients
1 bag tortilla chips 1 jar con queso dip 3 cups shredded Mexican cheese 1 can chili with beans S our cream
Directions
Put a layer of tortilla chips on a microwave-safe plate. Sprinkle with shredded cheese and/or con queso. Repeat layer. Spoon chili on top and heat in microwave until cheese is melted and chili is hot. Dot with sour cream and serve.
#9 BBQ Crockpot Chicken Sandwiches
Start this easy recipe early in the morning and it will be ready at lunch time. Ingredients 1 bag rinsed, frozen chicken breasts or tenderloins 1 bottle barbecue sauce 12 hamburger buns Directions Add a liner to your crockpot, followed by the chicken and the barbecue sauce. Cook on low for 8-10 hours. Shred with two forks or even better, use your hand mixer while the meat is still in the crockpot. Serve on hamburger buns.
The first step is quickly going through your pantry to throw out any expired items and set aside any usable goods that you know you won’t eat for charity. Work on one shelf at a time and wipe it down after you’ve emptied it.
If you want to take the time to organize the shelves, do it. Otherwise, just purge and wipe down!
#2 List items in pantry and freezer
Once you’ve replaced the items you’re keeping in the pantry, you’ll want to make a list of items that aren’t staples. For example, you won’t list flour, but you would list diced, canned tomatoes. I created a form for this purpose for you.
As you’re listing the items, you will have an idea of how to use them up. For example, if I saw canned tomatoes, I would write chili next to it. If you don’t know what to make to use up an item, leave that section blank across from the item.
When you’re finished with the pantry, you’ll do this with your freezer, too. You’ll write Freezer in the Location blank at the top of that form. Don’t worry. You don’t have to clean out your freezer, too, unless you have time. You’re looking for items that will help you make the meals you noted as you went through your pantry. So, if I see a package of precooked ground beef in my freezer, I will add it to the list. Across from it, I will write chili in parentheses to indicate that I have already found other items needed to make this meal.
This process sounds more time-consuming than it is. Set your timer for 15 minutes and see if you can’t knock it out!
#3 Find recipes
After you’ve done what you can, thinking of meals to use up pantry & freezer items, it’s time to use the power of AllRecipes. Before you look for recipes, open your Recipe Box. (Create an account so you can have one if you don’t already). Then add a folder called “Pantry Clean Out” or whatever you like.
When you’re done, use the ingredient search–a feature I’m crazy about! Simply add the orphaned ingredients you’ve listed and search for top-rated recipes. Let’s say you found canned artichokes in your pantry and chicken in the freezer. Search and you might find this yummy recipe I can’t wait to try:
Add the recipes you want to your Pantry Clean Out folder in your Recipe Box. This is honestly the most fun part of the challenge! Continue with all of your items until you’ve found recipes for them. You’ll want to note on your list where you found the recipe. Use AR if you find it on AllRecipes.
#4 Make shopping list & shop
One column of the form is for you to indicate whether you are planning a breakfast, lunch, dinner, snack, or dessert (De) recipe. Completing this form will tell you if you need to plan any additional meals for the upcoming week or weeks.
You’ll also find a column for adding ingredients that you still need to make the recipes. This is perfect if you prefer a written shopping list. But if you want to make a shopping list directly from AllRecipes, just click on the recipes you’re shopping for and click+ Shopping List. Doing it this way will require you to check off the items that you already have on hand. If you have the All Recipes iPhone app, you can see the shopping list on your phone. If you have any items on your list that you may already have in your refrigerator, be sure to check.
I previously recommended AllRecipe’s Menu Planner that is available with their paid Pro Version. I now use Plan to Eat for this purpose. It requires the extra step of importing recipes you like into Plan to Eat, but it’s fast and well worth it. The planner and shopping list are a dream to use. The added benefit is that the site and shopping list are available on mobile, so you can be on Android with no problem. I love Plan to Eat so much that I’m an affiliate. What’s wonderful is you can give it a test drive for 30 days for free. If you love it, your subscription is as low as $3.25 a month.
I love my crock pot any time of year, but there’s something about the aroma of comfort food in the fall that makes me happy, happy, happy.
Gimme recipes that I can make without awakening a brain cell and I’m ecstatic!
That’s what I’m sharing on Stuff Parents Need today. Hope you’ll read the recipes, will pin them, and most of all, will try them! You won’t be sorry.
These recipes are perfect for adding to your Once and for All Meal Plan. Be sure to follow Stuff Parents Need for 31 Days of Unforgettable Recipes that may make their way onto your meal plan, too.
I’m a Christian psychologist turned homeschooling mother of six. My life can be a little crazy, so I look for sanity-saving ideas to use and share. I hope you’ll read my About page to learn more.